
Step One: “Manage Your Profile,” i.e. Register Your Organization
Your organization’s profile is equivalent to your organization’s registration with the Yale College Dean’s Office: by completing your profile, you are registering as an organization and will be granted all the privileges of registration.
You can edit your organization’s profile two ways.
-
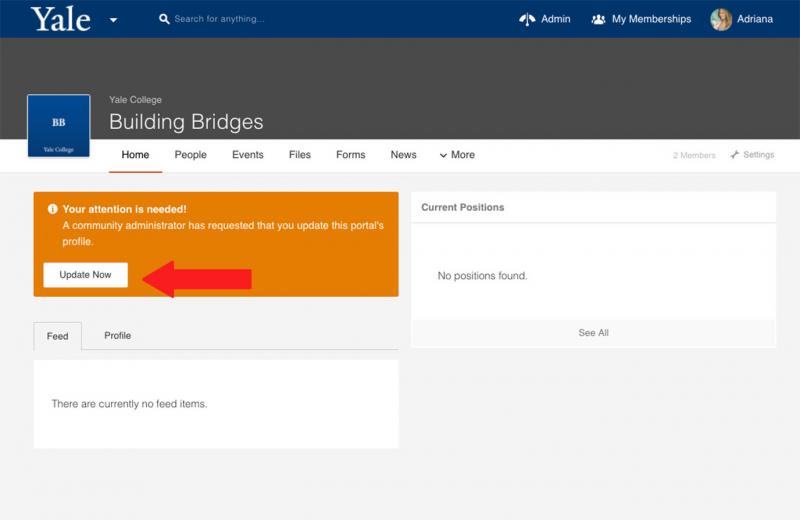
If your organization has not yet re-registered for the academic year, you will notice an orange box that says “Your attention is needed!” on your home page. Clicking “Update Now” is the first way to edit your registration profile.
-
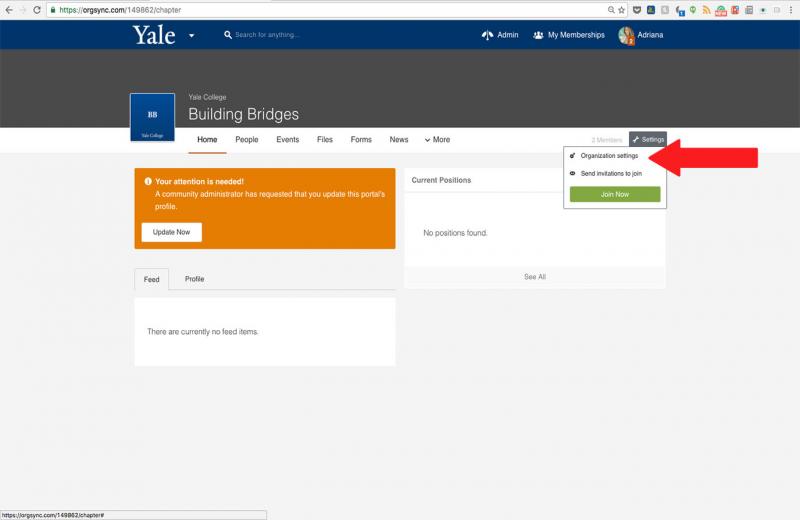
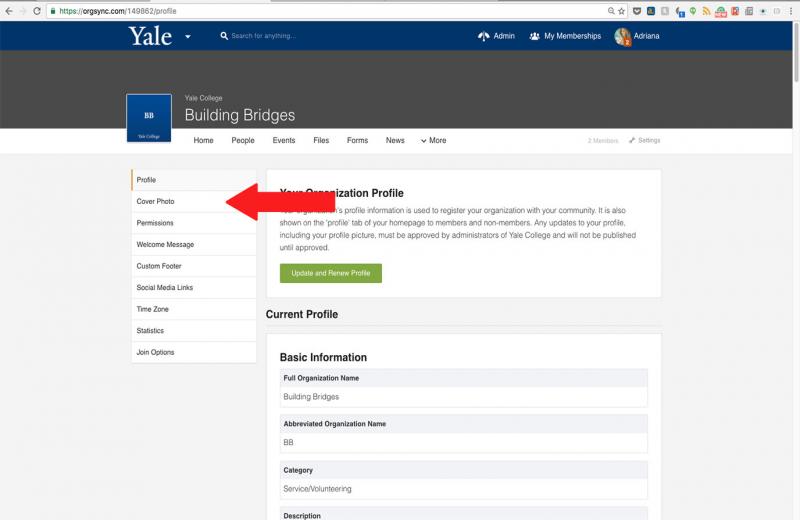
You may also want to access your organization’s profile through your portal’s “Settings.” To do so, hover over “Settings” in the tool bar. Then, click “Organization Settings.” If you do not see “Organization Settings” as an option, you are not the administrator of a portal. To gain administrative access, follow these directions.
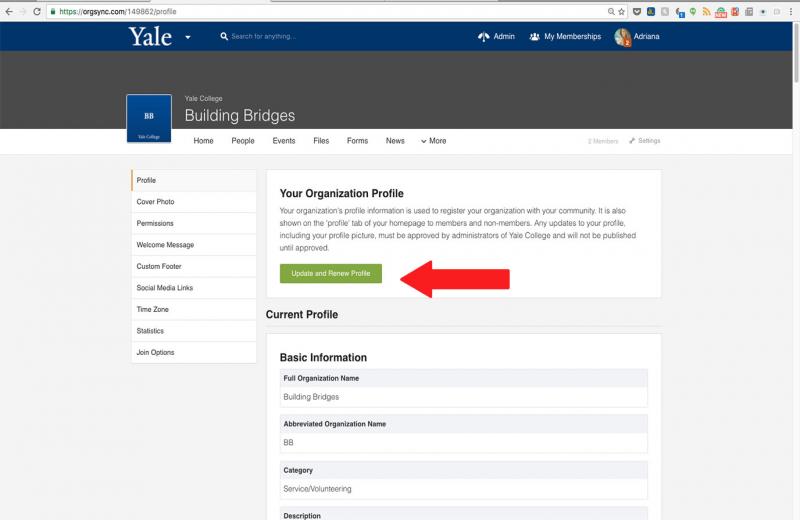
You will then see a box that says “Your Organization Profile.” Click “Update and Renew Profile” to complete your registration.
When completing your Organization’s registration:
- Carefully consider what you choose as your keywords and your description. Your description will be the first thing to pull in new students to your organization and is publicly visible. In addition to your organization’s category, your keywords are the searchable terms others may use to find your organization’s portal.
- Remember that you will change or upload your organization’s profile picture as part of your organizations registration. You can only change your organization’s picture by re-submitting your registration.
- Note that you will not be able to change your organization’s name, short name, and/or category through the registration form. To change the name, you will need to fill out this form instead, available through the All Yale College portal.
- Each of your organization’s officers must have an Yale Connect account AND belong to your organization’s portal before you begin filling out the registration information. One of the first things the registration profile will ask you is to fill “Positions” in your portal. In order to assign someone to a position, they must first have a Yale Connect account and belong to your organization’s portal. Your organization is required to have a President and a Treasurer. YCDO policy states you may only have one listed Treasurer for your organization. You are also given the option of assigning a Communications Officer.
- The remainder of the registration profile will ask questions about your organization’s constitution, advisors, financial information, online presence, and leadership. Be prepared by collecting your organization’s institutional documents before sitting down to complete the profile.
Step Two: Write a Welcome Message
Congratulations! You’ve officially completed your organization’s OrgSync profile and re-registered your organization with the YCDO. The next step of your Yale Connect journey is to write a “Welcome Message” for your organization.
Your welcome message can include videos, photos, or text as a way to greet visitors to your page. We suggest adding key details about your organization here. Perhaps your executive board is more exhaustive than the positions Yale Connect offers. Your Welcome Message is a great place to highlight their names, what they do, and the first point of contact for new members. Maybe your organization has a great video highlighting an event you’ve put on—plop it in! Get creative with your welcome message and consider the “brand” of your organization.
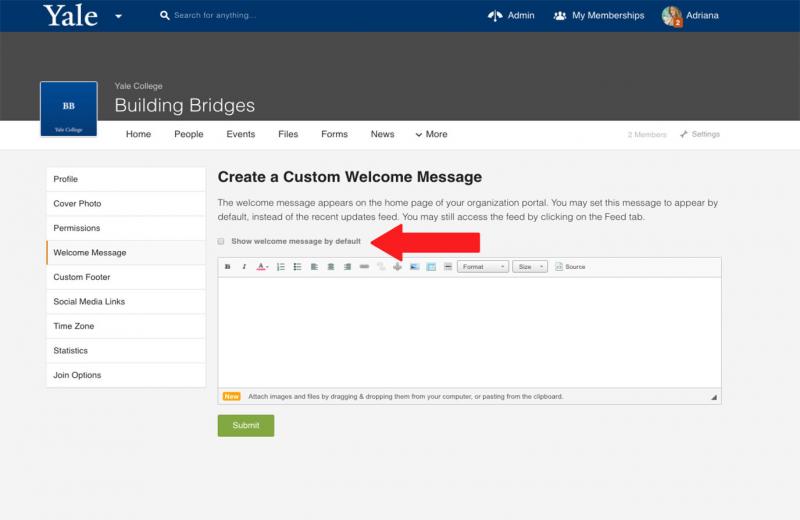
To access your welcome message, hover your mouse over the “Settings” feature in the toolbar.

On the sidebar menu, choose “Welcome Message.”
 Start writing and uploading your message. Note that if you choose “Show welcome message by default,” visitors to your page will see your organization’s message and profile before they see your OrgWall. This is a great option if you expect not to consistently upload new content–that way, rather than an empty OrgWall, visitors will see your thought-out welcome message.
Step Three: Cover Photo
To change your organization’s cover photo, maneuver to your organization’s settings and choose “Cover Photo” in the menu sidebar.
 Make sure that when you upload a picture, it is the recommended size of 2000 pixels wide x 320 pixels tall for the best formatting.
